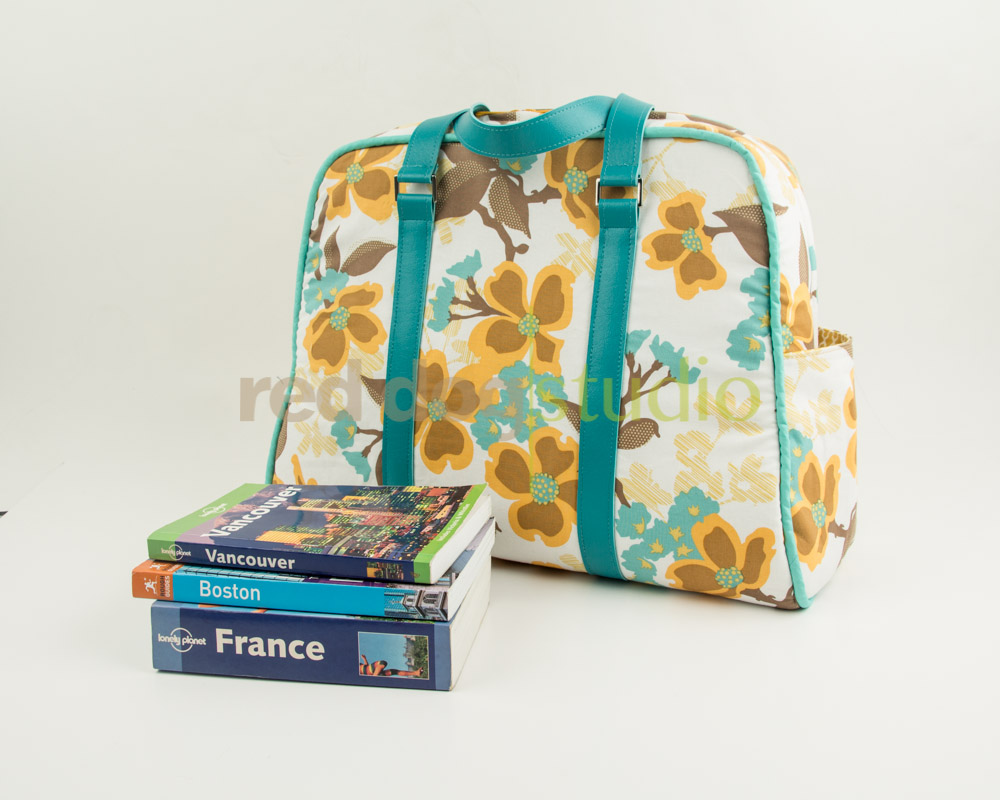
Swooning Over Swoon: The Vivian Traveler
First things first, I sew with knit. I mean how easy is knit: no interfacing types to keep track of, no buttonholes to make, no zippers to put in. Secondly I sew children’s clothes and cloth diapers! But holy smokes did I learn a lot and there were a lot of firsts (besides this being the first bag I’ve ever made). This bag is far from perfect, I should have bought pre-made piping for example, but I am so giddy with how this turned out. I guarantee the next one will be more amazing (which means, do I keep this one and make another one for my mom!). Even though I was nervous every step I also had a lot of fun. I actually took off my walking foot for a change and used feet I’ve never used that sit so eagerly at the top of my machine crying “try me!” I even whipped out the acrylic table that came with my machine to better support the bag pieces as I was sewing.
I have to mention that I am pretty sure this experience would not have been so fun if it weren’t for the wonderful ladies in the Swoon Facebook group. Alicia, the pattern maker, is very active as well always popping in with tips and tricks when people ask. If it weren’t for the group I wouldn’t know SF101 from my backside or gain tips on sewing vinyl. There is so much inspiration there it is hard not to sew all the Swoon!
I used all the interfacing and stabilizer that were called out in the pattern. I did not make any substitutions. I have learned via the Facebook group that there are many different ways to combing the stabilizers,
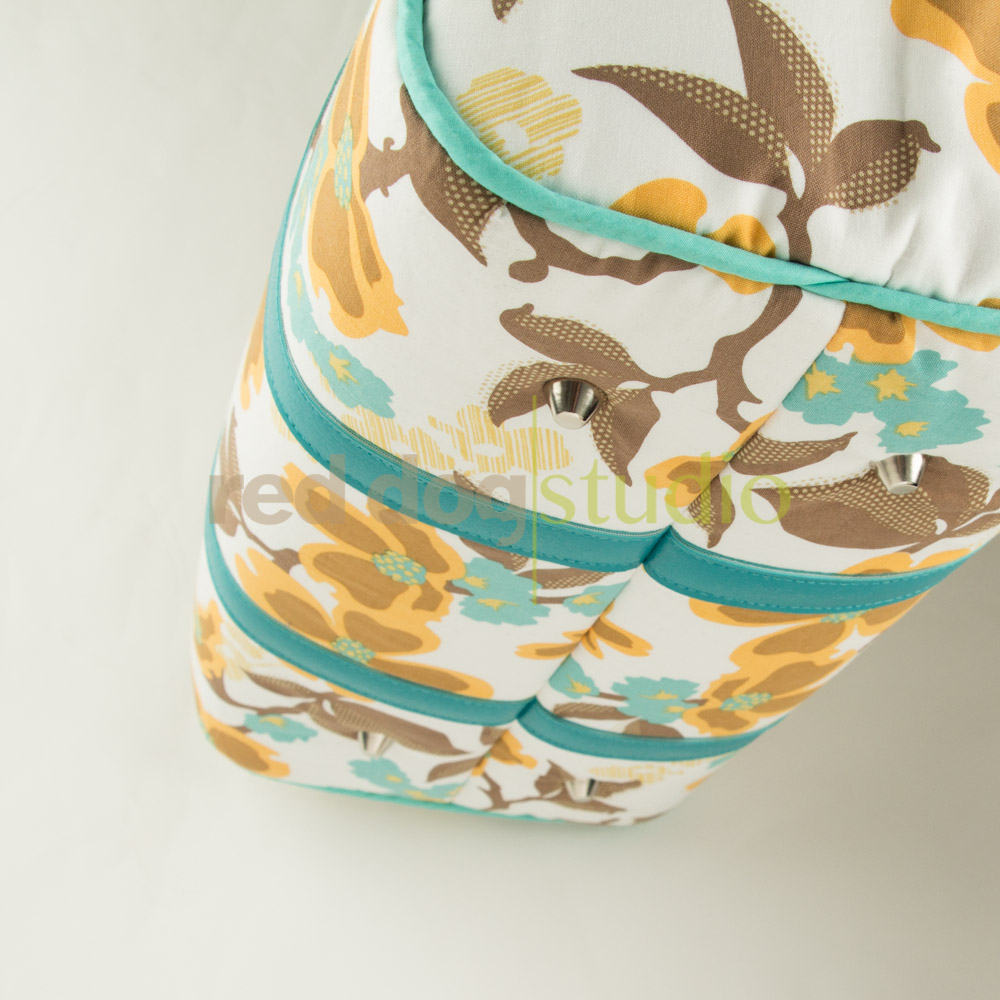
interfacings and fusibles it can make one’s head spin. All to achieve different looks and stiffness. But I’m happy with exactly what the pattern called for. I did, however, add purse feet and just placed them where I thought they looked sort of normal. The only change I will make the next time is I will definitely be adding length to the handles. They are more throw around your arm (think Sophia in the Golden Girls), not throw around your shoulder, length.
If you’re new to bag making like I am, take it slow and just click-through the instructions step by step. I will say I wish there were a hair more illustrations but there are some great tutorials on the Swoon blog that helped me visualize how to do the drop in lining, for example. But any mistakes I made that called for a seam ripper were because I didn’t read the pattern close enough.
Just FYI, here’s where I sourced my items (these are not affiliate links but the actual places I ordered from):
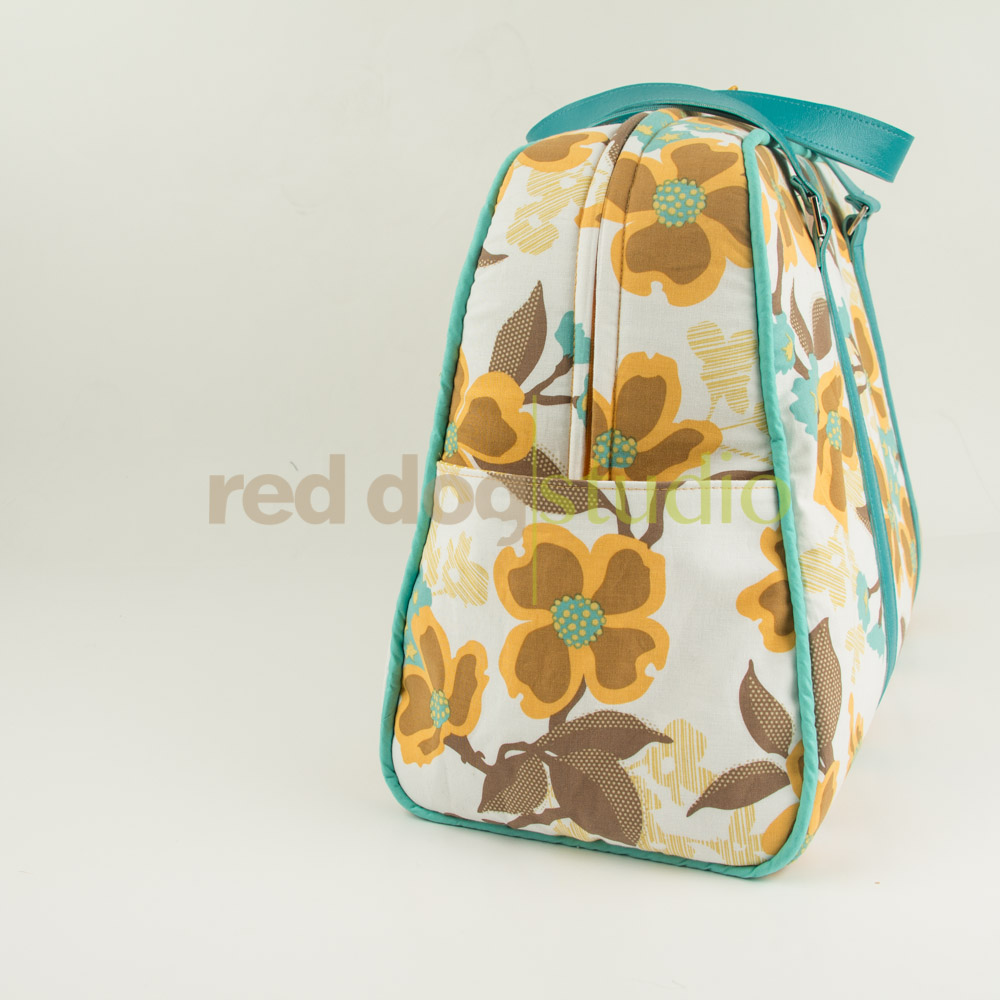
Main Fabric: Joel Dewberry | Dogwood Bloom
Lining Fabric: Camelot Cottons | Neat in Mustard
Solid Coordinate for Interior Pocket & Piping: Solid in Mirage Blue
Foam Interfacing: By Annie’s Soft & Stable
Double Pull 30″ Handbag Zipper: ByAnnie’s
Hardware: Nickel finish from ByAnnie’s
Pellon Fusibles & Stabilizer, Marine Vinyl used for straps, & Purse Feet: My Local JoAnn’s (I will probably try the marine vinyl from fabric.com next as I believe it’s a little thicker). Sparkle Vinyl is also all the rage these days and I’ve heard you can get it at Punkbroidery or Once Upon a Yard.


